Azure backup allows you to securely link one or more servers to a backup store. For some reason I had some initial difficulties getting the certificates to all line up – so this is a quick note of what worked.
Server 2012 and Server 2008 R2 are supported clients
Azure backup works using the Azure backup agent (downloadable from your Azure recover services, backup vault account. Having installed this the first step is to link the server that its installed on to the Azure backup vault. This requires a certificate. There are options to self generate – but seeing as we had a proper one I thought I’d use that.
- Certificates must be imported into the local COMPUTER personal store. This is different from you own user personal store
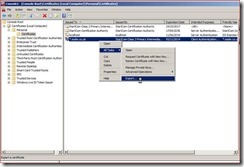
- To do this I had to be logged on as Administrator, then Start / Run MMC and then Add Snap in for certificates and select personal computer
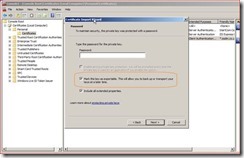
- Import pfx file here - making sure certificate ends up in Local computer personal store. Also make sure you import it with option to export

- Then export the certificate as a .cer file default option will do (Don’t think you need to export the key)

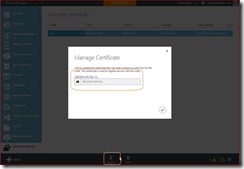
- In Azure – upload the certificate lo link this server to the azure backup account

- You can then run through the Wizard connecting Azure Backup agent to the backup store. If all has gone well you will be offered your newly imported certificate to use. If you have gone wrong – it will say no certificate available.
You will also be asked to generate a passphrase as the encryption key. Lose this and you will never recover your data if you need to re-install – so its suggested soring on USB stick securely.
Costs:
Currently first 5GB is free – then 0.18 pence per GB / month